Flipped normals are quite a common occurrence in Blender. In this post, we will help you understand what it means, and how to fix it!
What are flipped normals?
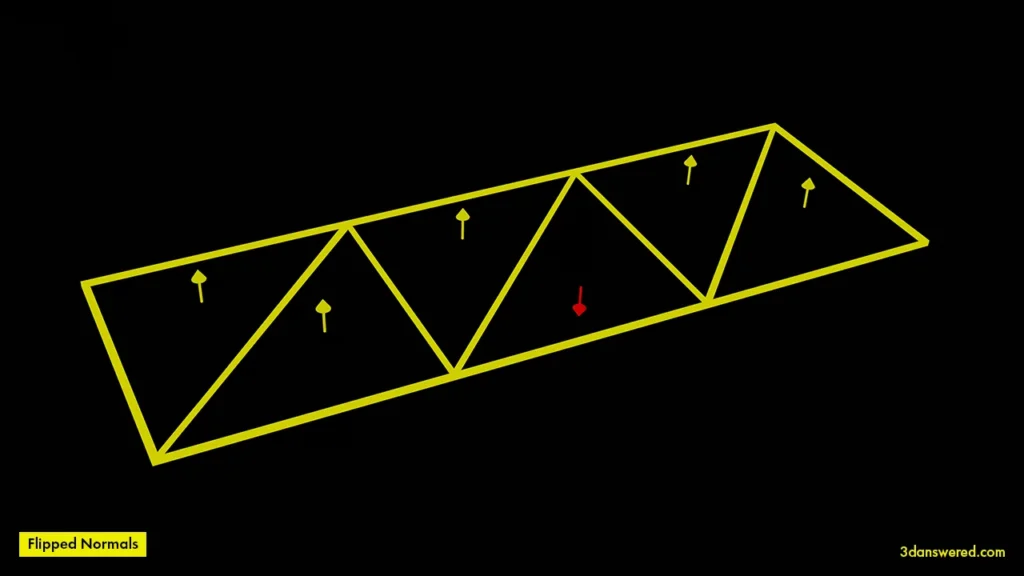
Each polygon in 3D has a direction it faces, and when the normals are flipped, it simply means the direction of the polygon or polygons is incorrect.

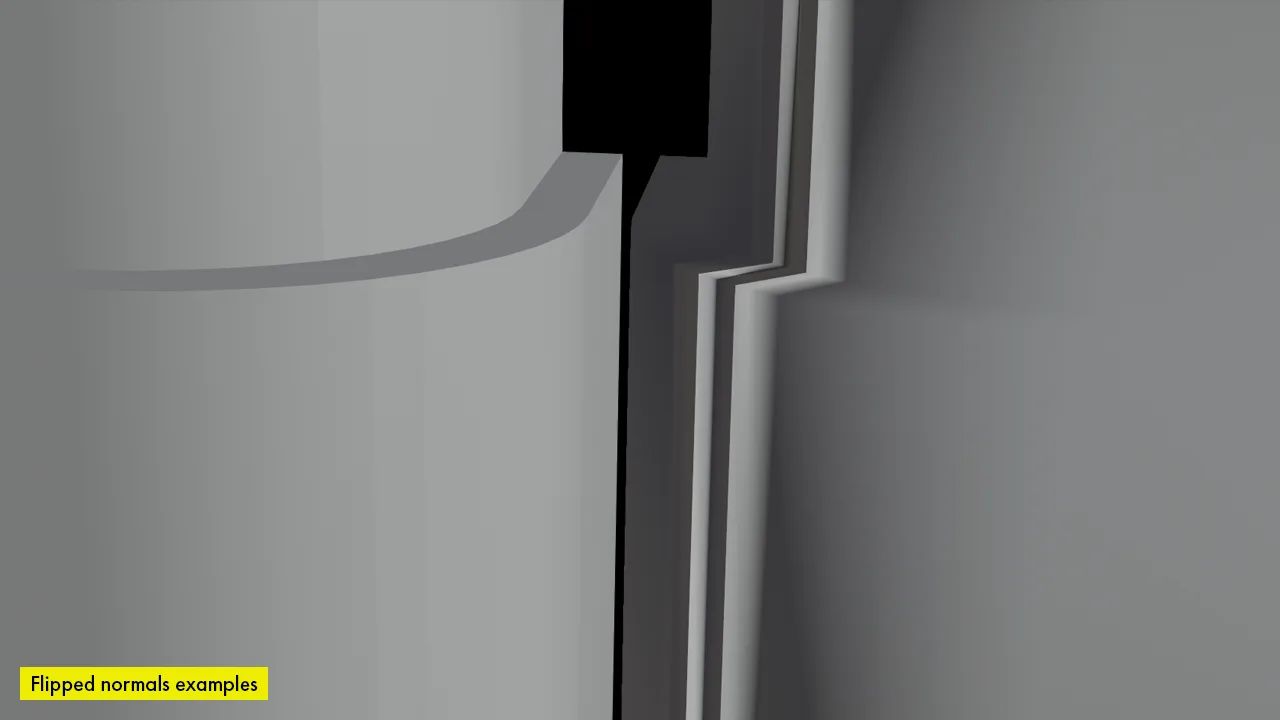
This can create a multitude of problems, but visual artifacts are the most common. These artifacts can look like discolored polygons or sharp lines on otherwise smooth surfaces. When exporting the model into game engines like Unreal Engine or Unity, flipped normals can lead to invisible polygons due to backface culling. In short, even if they don’t create any artifacts now, it still is good practice to keep normals facing the right way at all times!
In some cases, seeing the “wrong” side of a polygon is still okay, for example with hair cards or other models that may use double-sided materials.
How to check for flipped normals?
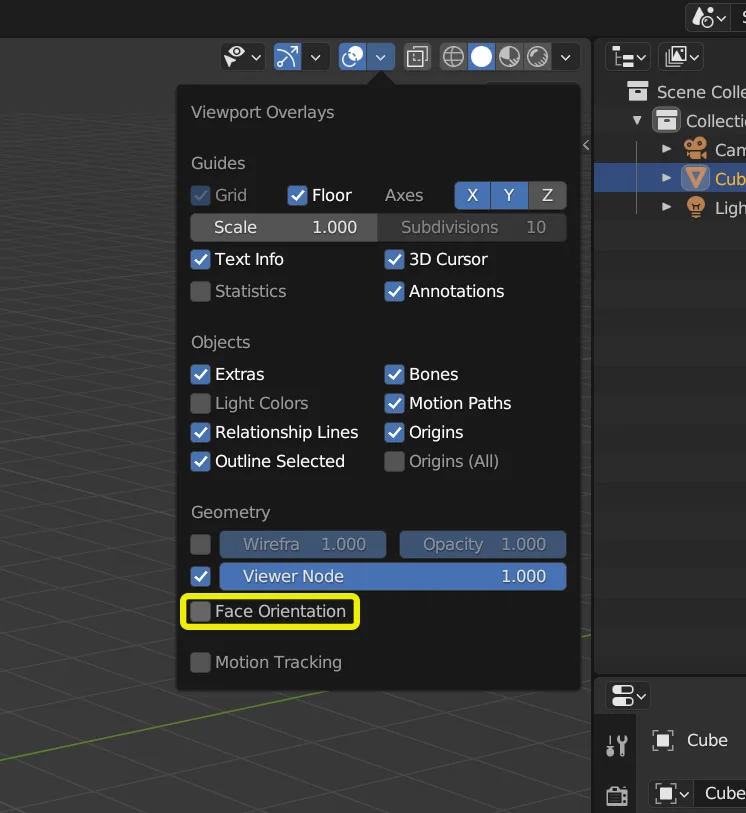
You can check your model for flipped normals by going to the overlay menu on Blender, and ticking “Face Orientation”

How to fix flipped normals in Blender?
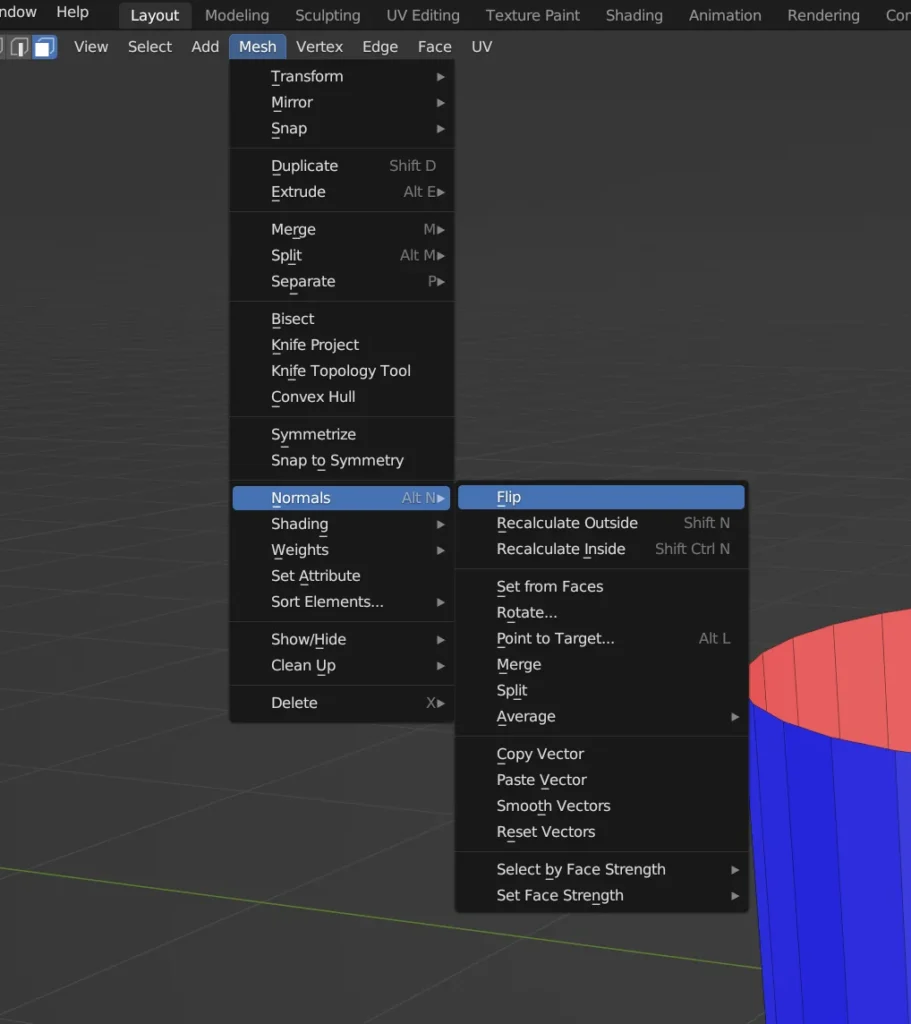
Fixing flipped normals is thankfully really easy in Blender! Just select your model, go into edit mode, select all polygons by pressing “A,” and then press “Shift” & “N” to “Recalculate Outside.”
If you still see polygons that have flipped normals, you can select them in edit mode and from the top menu select “Mesh > Normals > Flip.”
